Bleeds Demystified
Bleeds are super important, but for people who don’t live and breathe print like we do, they can be a bit confusing. If you need to get yourself up to speed quickly, I’m here to educate.Bleeds: What even are they?
Bleed as a verb: A printed piece is said to “bleed” if the image reaches all the way to the edge of the sheet.| Fig 1.1: These layouts bleed. | Fig 1.2: These layouts do not. |
Bleeds as a noun: “The bleeds” are a feature of a layout prepared for print that allow the finished product to bleed.
Fig 2: The bleed area around the perimeter of the layout
Why do I need bleeds?
Maybe you don’t! If your design leaves plenty of white space around all four edges (like the examples in fig. 2 above), then it doesn’t bleed and you don’t need to worry about including bleeds in your file.Otherwise, it helps to understand that most print jobs, including anything that bleeds, are printed on a sheet that’s larger than the design’s finished size, because most printing equipment is unable to simply print to the edge of a sheet.
The complete press sheet looks something like this:
Fig 3: A press sheet. The bleeds are highlighted in yellow.
The bleeds, highlighted above, are an area where the layout extends beyond its intended final size. Ultimately, this area is trimmed off, leaving a clean, professional finished product.
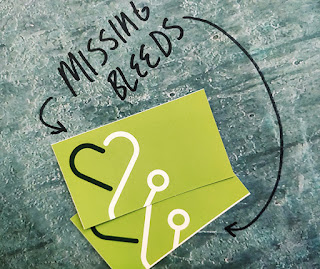
What happens without the bleeds? The slightest imprecision in the position of the print and/or the trim becomes totally conspicuous:

Okay, how do I set it up?
A common industry standard is to include at least an eighth-inch of bleed on all four sides. Specialized printing methods may require more or less, but for our purposes we’ll go with 1/8". Here’s how to configure your document to bleed in some common pieces of software:InDesign
Select “Document Setup” from the “File” menu. Pay attention to the section at the bottom labeled “Bleed and Slug.” (You’ll need to expand it if it’s hidden.) An eighth-inch can be entered as “0.125 in.” Don’t worry about the slug; that’s a subject for another day.
Now, when you view your document in normal mode (as opposed to preview mode), you’ll see the bleed area outlined in red. Make sure any part of your design that’s intended to hit the edge of the sheet extends beyond the trim line and reaches the red bleed line.
When it’s time to export your document as a PDF, make sure your export settings are configured to include the bleeds:
Illustrator
Select “Document Setup” from the “File” menu. Set the four fields labeled “Bleed” to “0.125 in.”Now, you’ll see each artboard’s bleed area marked with a red line. Make sure any part of your design that’s intended to hit the edge of the sheet extends beyond the edges of the artboard and reaches the red bleed line.
When it’s time to save your design as a PDF, check the “Marks and Bleeds” section of your configuration to make sure you’re including the bleed area.
Photoshop
Photoshop doesn’t include any native support for including a bleed, so it needs to be done on a somewhat ad hoc basis.First, select “Canvas Size” from the “Image” menu. (Not “Image Size!”) In order to account for an eighth-inch bleed on the top, left, right, and bottom edges, make your canvas size a quarter-inch wider and a quarter-inch taller than the intended final size. For example, if you’re designing for a final size of 8.5"×11", make your canvas size 8.75"×11.25".
Depending on how your document is composed, some or all of your layers might already fill the new added bleed area. On the other hand, if you started with a flat image, the extra eighth-inch will be empty:
If your image doesn’t fill the bleeds, I’ve got a helpful cheat for you. Use the eyedropper tool to select the empty bleed area.
From the “Edit” menu, select “Fill.” Set “Contents” to “Content-Aware” and hit OK.
Photoshop will automatically guess what the missing part of the image should look like.
Because the bleed area will ultimately be trimmed off, don’t worry too much if parts of it on the outside look a little weird. But you might need to perform a few manual touch-ups if anything sticks out close to the inside of the bleed area.
Once you think your bleeds are ready for production, save your document as usual.
Canva
From the “File” menu, select “Show print bleed.” The final trim size of your document will then be marked with a dotted line, with the bleed outside of it. Make sure any part of your layout that needs to bleed extends all the way to the outer edge of that area.When you’re ready to download your document as a PDF, make sure the “Crop marks and bleed” option is enabled.
I hope this little tutorial has provided you with the understanding and the confidence to create beautiful bleeding print layouts. If you’d like further clarification about anything I’ve covered (or haven’t covered), feel free to give me a call. Thanks for reading!


